User and Programmers Guide
Introduction
Welcome to the User Guide of the Self Service Interfaces. The Self Service Interfaces provide a support for the users of the cloud infrastructure and platform to manage their services and resources deployed in cloud. For the moment it consist of open source implementation of a User Portal and Scripts. The User Portal is implemented in a form of a Web GUI following the same functionality as the OpenStack Dashboard. All about the implementation and the functionality of the OpenStack Dashboard can be found under the Horizon project. The Scripts facilitate direct approach to the underlying cloud resources through a command line and is addressed for administrators. This user guide describes the User Portal part of the Self Service Interfaces.
Note: The SelfService Interfaces is a front end component, therefore for this GE there is no need to provide a programmers guide.
User Guide
The User Portal offers a stand-alone open-source implementation of the OpenStack Dashboard. Initially it provides the same functionality as theOpenStack Dashboard. Some interactions include (create, delete, update) over the virtual resources (images, instances, flavors, services, etc.).
The User Portal is a Backbone-based Web client-side HTML5 application, implemented in JavaScript. The backbone model-view-controller methodology contributes for better dynamism and makes it a stand-alone client application with no need for Web server to interact with the backend. Instead, it aims to improving the user experience by using AJAX for dynamic rendering of the views. Moreover it contributes to improving the user-experience of the OpenStack portal by offering responsive design which makes it adaptable to multiple device screens (desktop, smart phone, tablet, etc), customizable object oriented CSS and internationalization i18n to support different languages. The User Portal functionality is tightly related to a JStack Library - a JavaScript equivalent of the OpenStack API that represent the Scripts Interface.
The design perspective of the User Portal is the following. There is one implementation that follows exactly the same functionality and design pattern of the OpenStack Dashboard. It is aimed for all use-case and third-party projects that want to use it as an independent component.
The other implementation is build upon the same methodology. However, apart from the basic functionality, it is designed to further extend the functionality of the OpenStack Dashboard and offer advanced interaction with the Service Manager GE, the Resource Manager GE, Object Storage GE and Cloud Proxy GE. Some of the new operations will include: creation and management of vApps, VDC, possibility to create elasticity rules and display monitoring statistics etc. The design would be changed according the new functionalities and style guide requirements of the FIWARE project. The audience of this second implementation is the Cloud Hosting architecture adopters who would choose the User Portal as integral part of the architecture, to manage resources and platform components in coordination with the rest of the GEs.
Basic Use Case
Next we present the steps a user should do to launch his first Instance and access it using the cloud Portal. We assume the user already has an account.
Login
Figure 1 shows the initial login page on the Cloud Portal. Once the user obtains his credentials he can enter the Cloud Portal page.
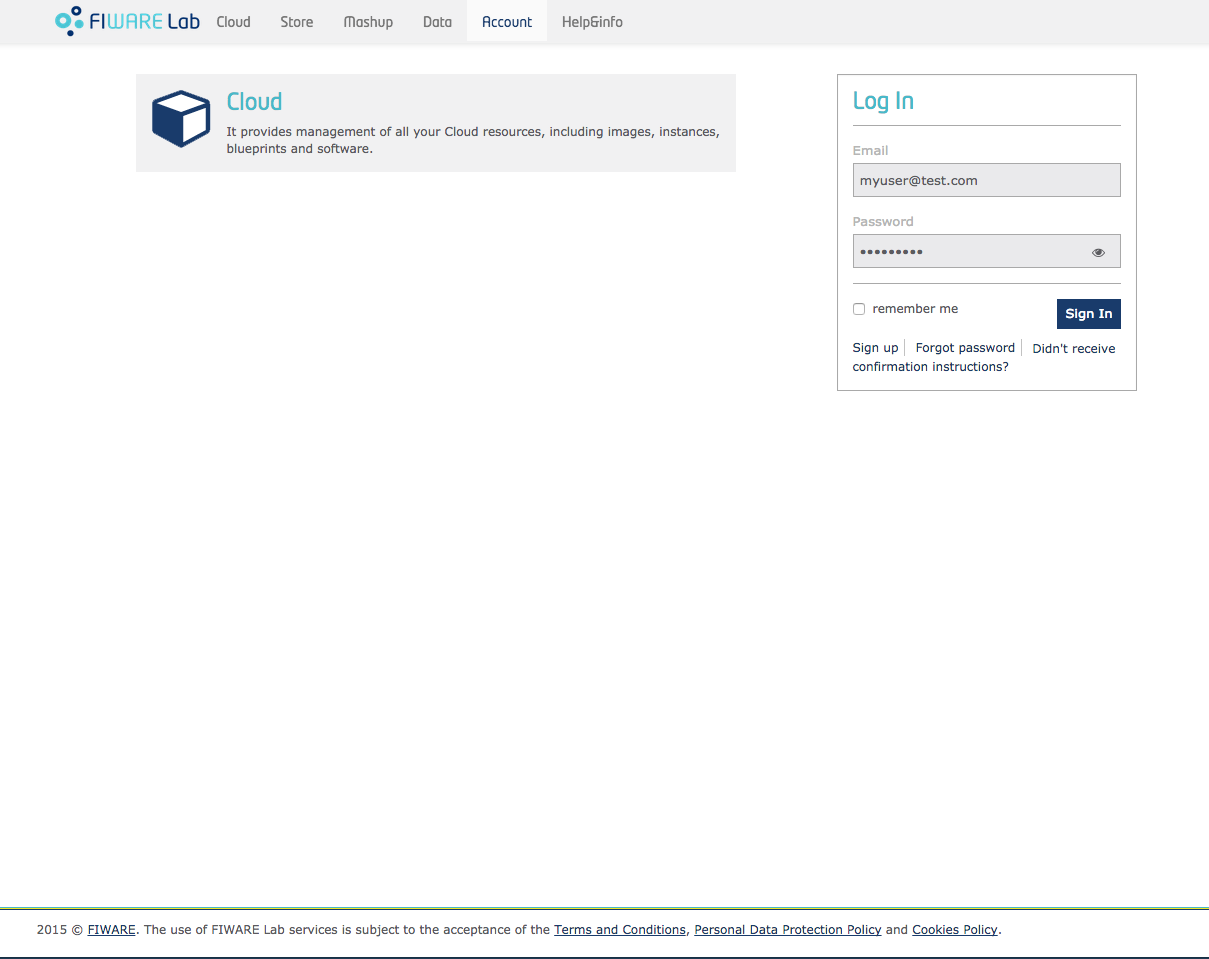
Figure 1: User Portal Login Page
Creating a Keypair
Once the user has logged in, he is redirected to the main panel of his account. There he has a list of the deployed VMs in his account.
To access the VM you will need a Keypair. Clicking on Security->Keypairs->Create Keypair you can create and download it (Figure 2).
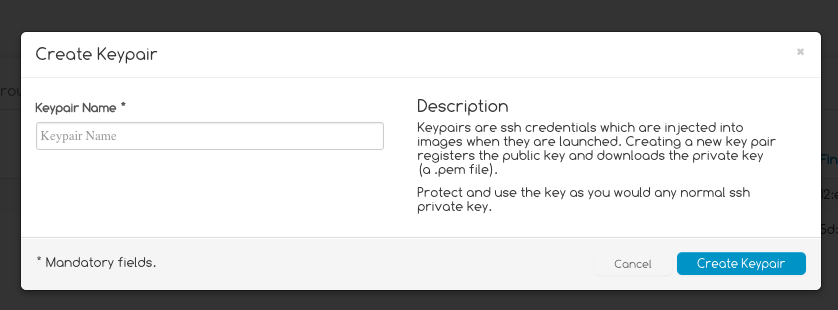
Figure 2: Creating a Keypair
Images List
Clicking on Launch New Instance he will retreieve the list of images availables (Figure 3). The user can choose an image type and launch an instance out of that image.
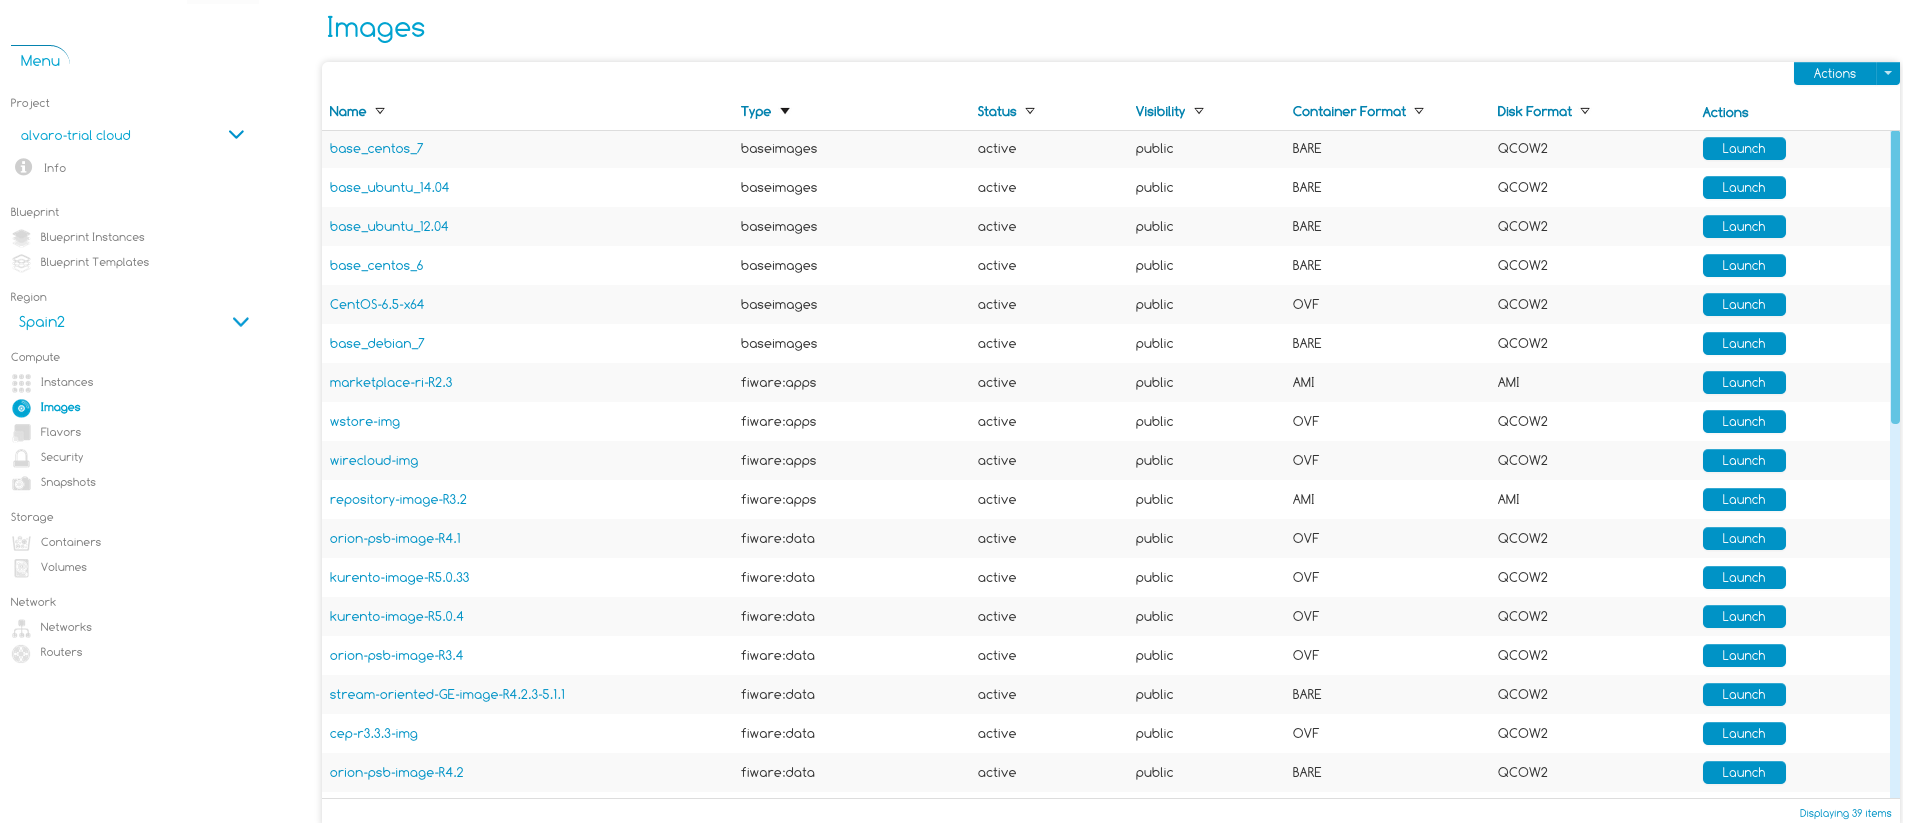
Figure 3: Images List
Launching an Instance
Figure 4 shows the wizard that appears when the user want to launch an instance. Following the steps he will launch the selected image as a VM.
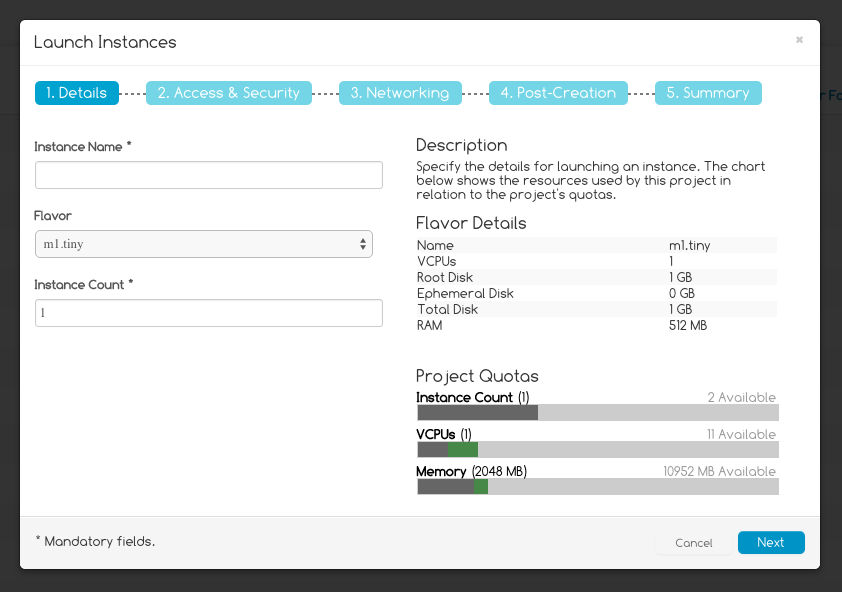
Figure 4: Launch Instance
Edit Security
Once the VM is launched, to access it via SSH protocol you need to open port 22. To do that you have to manage the Access and Security by defining different security groups and rules.
Figure 5 shows the window in which you can edit the rules for a chosen security group.
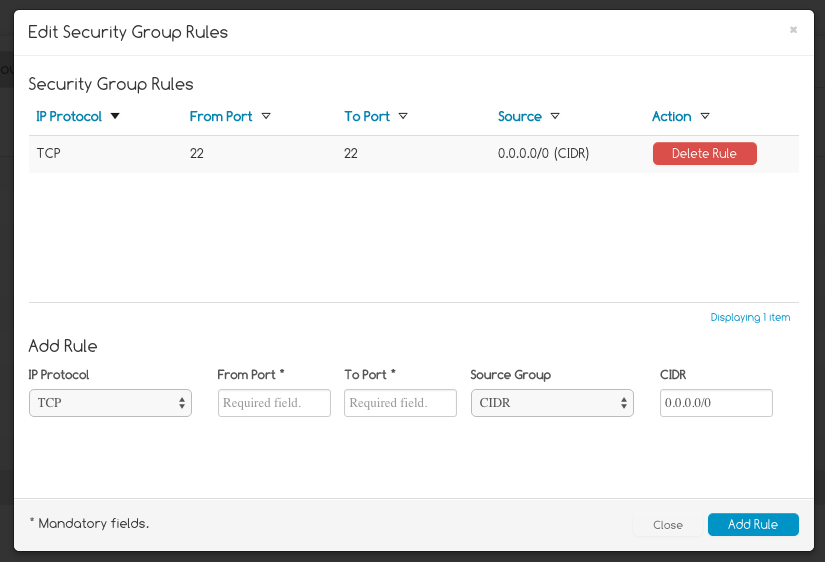
Figure 5: Edit Security Group Rule
You have also to assign a public IP to the VM. This way it will be accesible from the Internet. You have to allocate a new Floating IP using Security->FloatingIPs->Allocate IP to Project and the assign it to the VM you have just launched.
Connecting to the VM
Now you can connect to the VM following the instructions in Connection tab of the VM as Figure 6 shown.
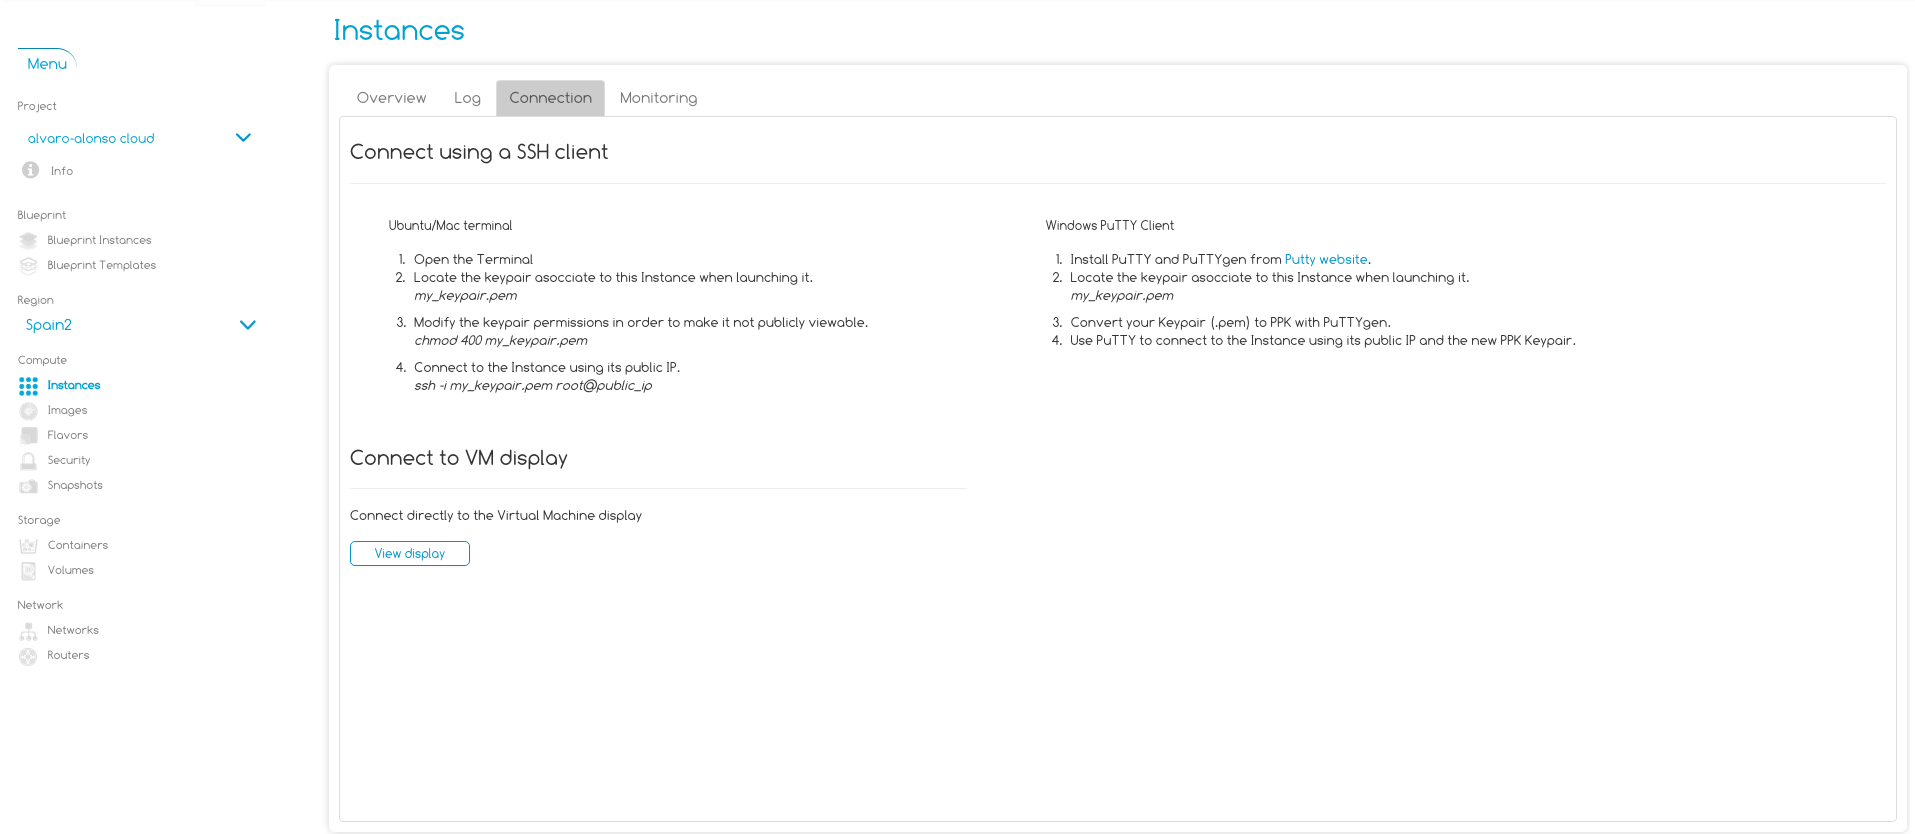
Figure 6: Instance Connection